| Document ID | CPENG03 |
| Product | Security Gateway, Security Management Server |
| Version | R80.10, R80.20, R80.30, R80.40 |
| OS | Gaia |
| Platform / Model | All |
In this article we are going to install the CPUSE Depoyment Agent
The process is same even we upgrade the CPUSE Gaia Deployment Agent on Security Gateway or Management Server.
There are two process to follow to upgrade the CPUSE Gaia Deployment Agent.
1. Using CLI
2.Using CPUSE ( Through Browser | GAIA WEBUI )
But as per my personal experience I recommanded to use CLI method.
STEP 01: Here in the below screen we see the authentication screen on the GAIA WebUI and we see that 192.168.1.2 is my Check Point Security Gateway IP address.
So basically I am going to install the CPUSE Gaia Deployment Agent in Security Gateway so give the credentials and click “Login”.

STEP 02: To check the current CPUSE Gaia Deployment Agent BUILD number.
Location : GAIA WEBUI —> Upgrades (CPUSE) —> Status and Actions

STEP 03 : The current BUILD is not the latest one so I need to download the new Build Agent so Refer the sk92449 to download the CPUSE Gaia Deployment Agent latest Build.
Select : Option 3 —> Dowload the latest buid of CPUSE Agent and whats New.

STEP 04 : Click here the Download Link to download the CPUSE Gaia Deployment agent build.
NOTE : Always download the Latest Build.

STEP 05 : As per the below screen we need to download the FILE (.tgz).

STEP 06 : Verify the MD5 value that we downloaded, so we are going to install the Md5Checker tool to verify , also we can refer other tools as well.

STEP 07 : Add the DeploymentAgent File using MD5Checker tool. so click Add to add the that .tgz FIle.

STEP 08 : Verify the MD5 value. If the MD5 checker show same then it’s OK.

STEP 09 : Login to GAIA Portal (GAIA WEBUI).

Change the Shell to /bin/bash to able to transfer the GAIA DeploymentAgent file to the Security Gateway (SG In my case ).
STEP 10: On view mode select “Advanced” then select user and on right side we able to see the username with Roles.

STEP 11: We create a new user by click on “Add” and As I put Login Name as “scpuser” and mention the password and change the shell to “/bin/bash” and also assigned Roles as “Admin Role” then click “OK”.
NOTE : On next step we learn how to create user using CLI.

STEP 12: Download the latest WinSCP software. You also preferred other application like FileZilla.
Link: https://winscp.net/eng/download.php

STEP 12: Open the WinSCP and put the IP address (Gateway or Management Server) my case I am install it in my Security Gateway and leave as by default.

STEP 13: Click “Update”.

STEP 14: Click “Continue”

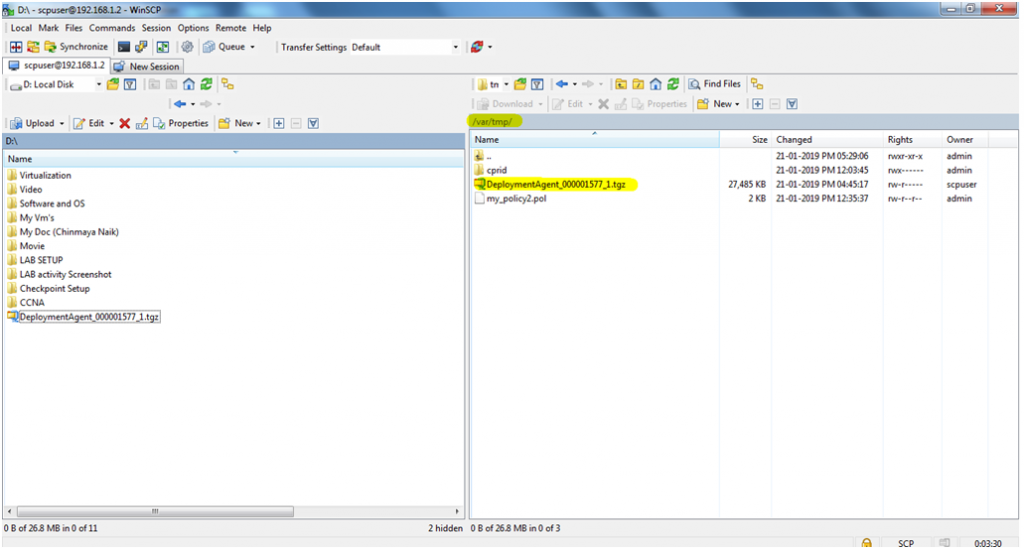
STEP 15: Click the “CLI” icon and go to the /var/tmp location by command : “cd /var/tmp”. We transfer the CPUSE Deployment Agent to this /var/tmp location. You can also choose any other location like /var/log.


STEP 16: Transfer the .tgz FILE to /var/tmp location.


STEP 17: Select “Binary” when we transfer any FILE.


STEP 18: Transfer is done successfully.

STEP 19: Verify through GAIA CLI.
Command : [Expert]#cd /var/tmp
          [Expert]#ls

STEP 20: Run the below command to extract the “.tgz” File.
Command: [Expert_Mode]#tar -zxvf DeploymentAgent.tgz
After running the above command you able to get the CPda-00-00.i386.rpm.

STEP 21: Run the below command
Command : [Expert_Mode]# rpm -Uhv --force CPda-00-00.i386.rpm

STEP 22: Run the below kill command and then automatically putty session will close.
Command : [Expert_Mode]# killall -v clish clishd

STEP 23: Run the below two command to Restart the “ConfD” daemon
Command : [Expert_Mode]#$tellpm process:confd
          [Expert_Mode]#tellpm process:confd t

STEP 24: Run the below command to start the CPUSE Agent manually.
Command : [Expert_Mode]#$DADIR/bin/dastart

STEP 25: Run the below command to Check the current Gaia Deployment agent build number.
Command :[Expert]#cpvinfo $DADIR/bin/DAService | grep -E "Build|Minor"

STEP 26: Login to the GAIA WEB UI (GAIA Portal) to verify the Gaia Deployment agent build number.

STEP 27: Verify the Build number.
Location —> Advanced —> Status and Action.


Leave a Reply