
| Document ID | CEWIN04 |
| OS | Windows Server 2012 R2 |
I am using VMWARE 12 PRO you can also use latest version of VMWARE.
For creating a Windows Server VM on VMware Workstation follow the below link.
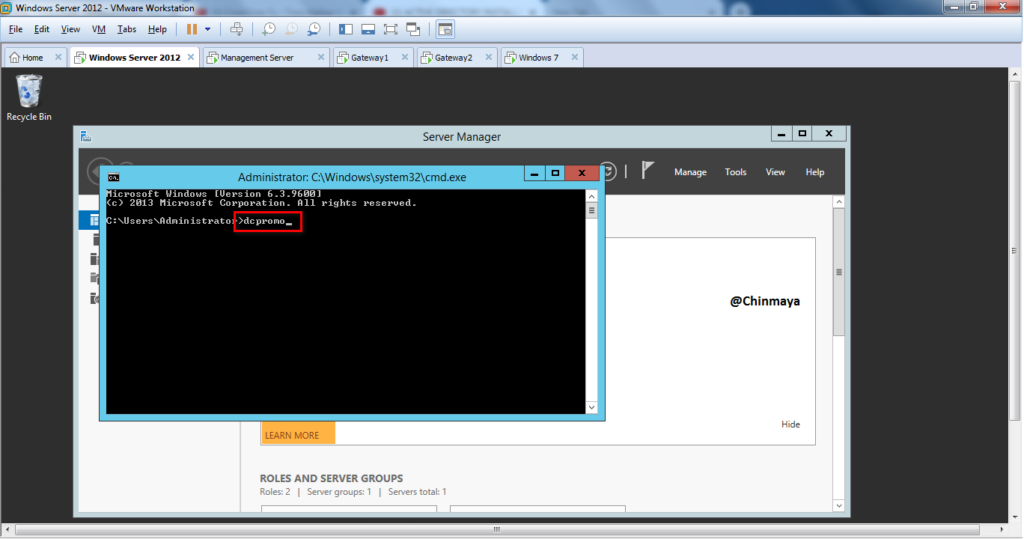
STEP 01: I open my Windows Server VM Machine.
Run “dcpromo”
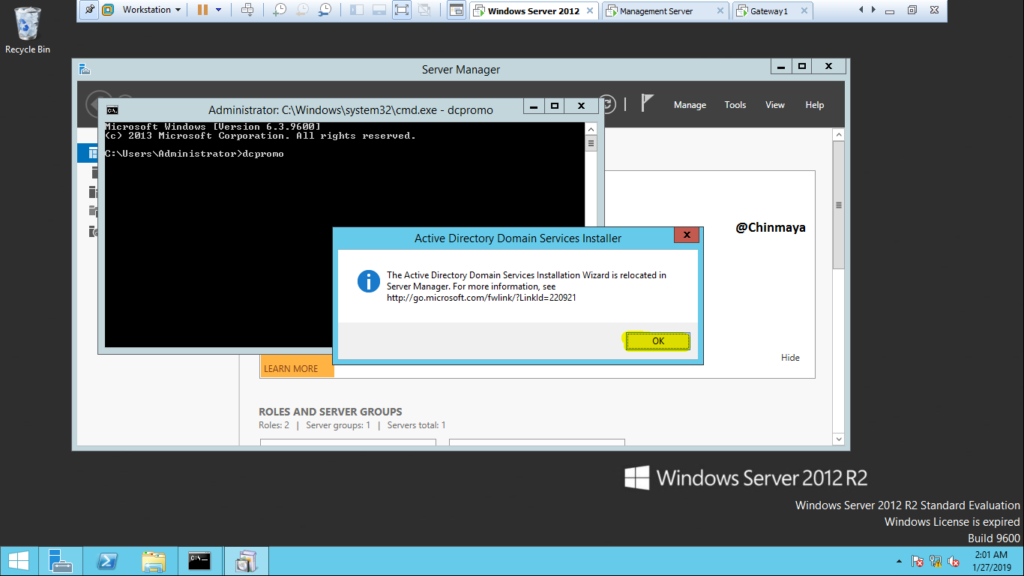
STEP 02: Click “OK”.
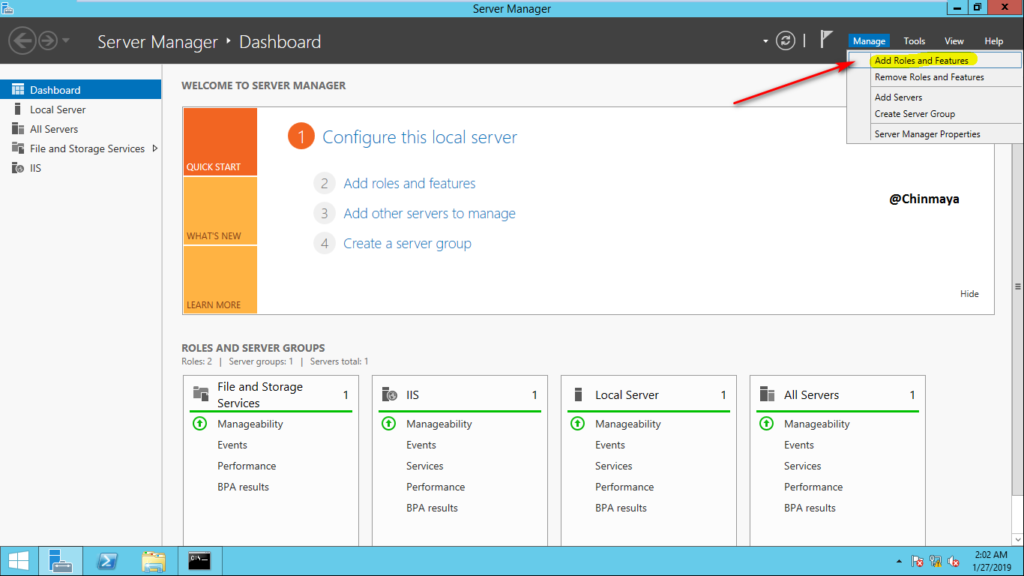
STEP 03: Click on “Add Roles and Features”.
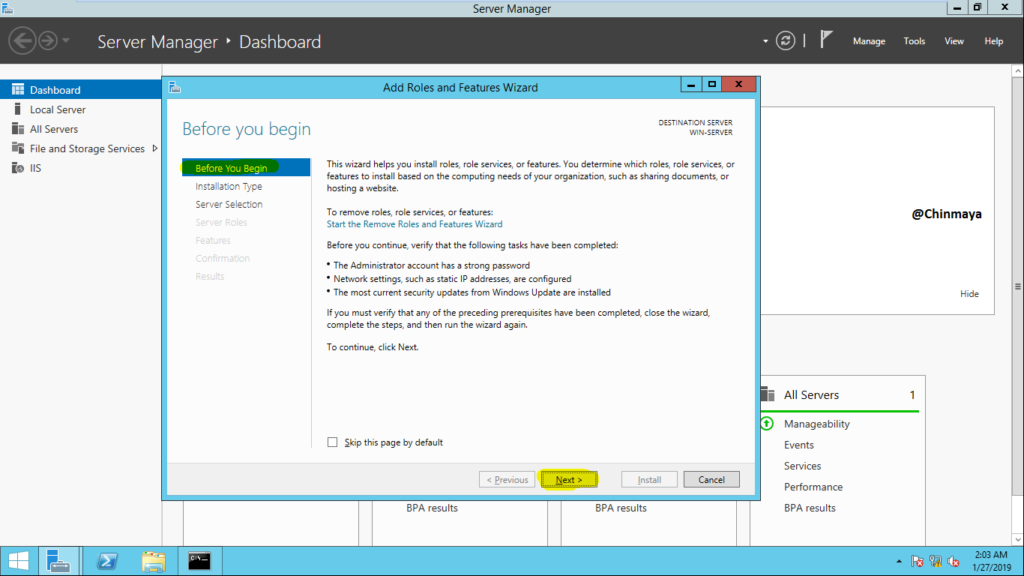
STEP 04: Click “Next”.
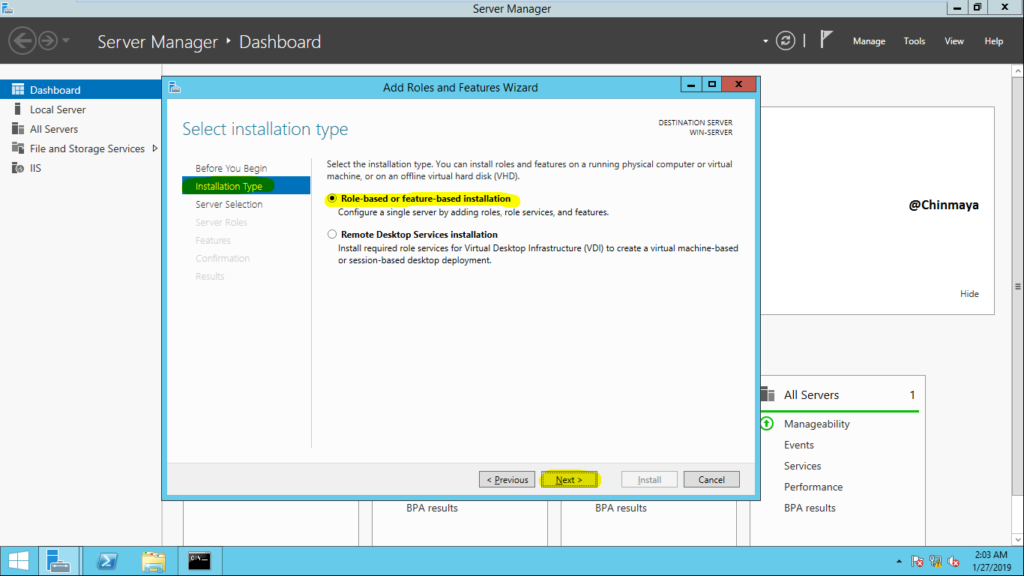
STEP 05: Select “Role-based or feature-based installation” and click “Next”.
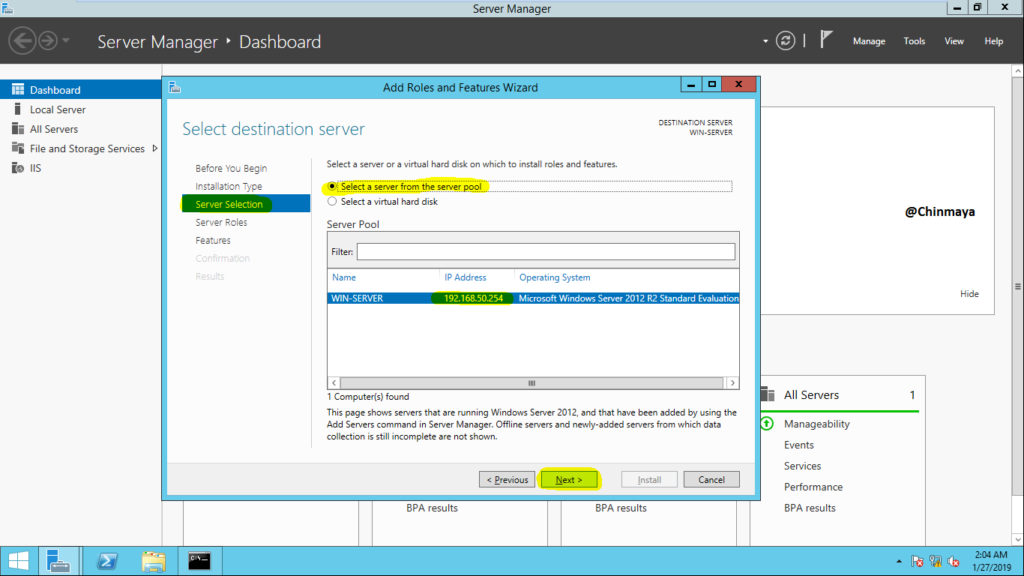
STEP 06: Select “Select a server from the server pool” and click “Next”.
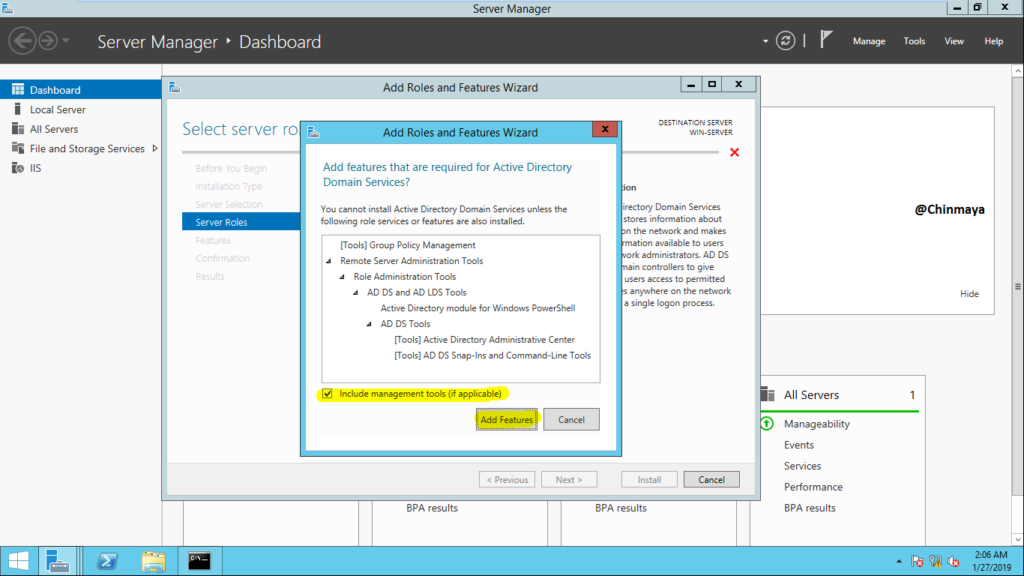
STEP 07: Click “Add Features” and Select “Include management tools (if applicable)”.
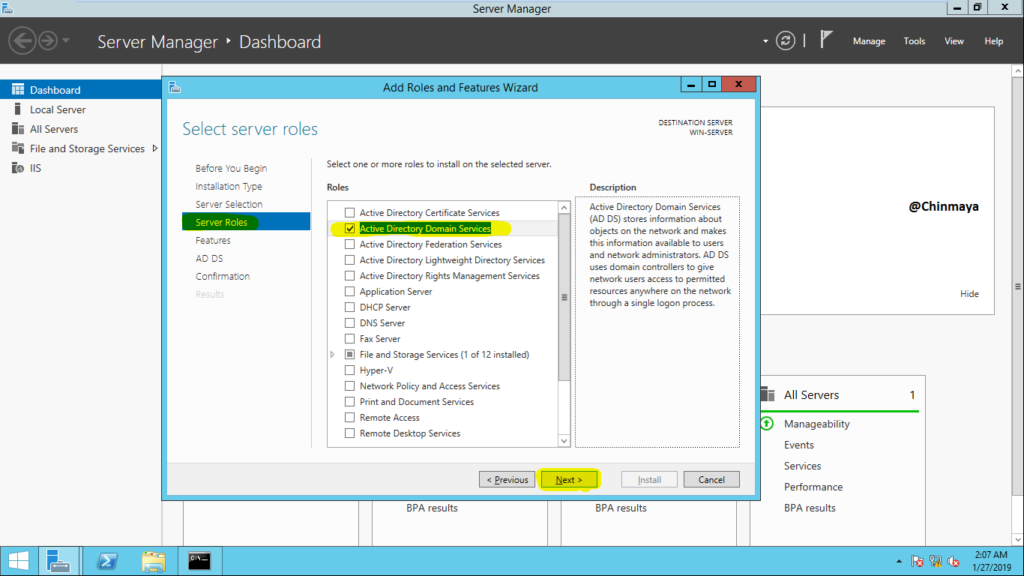
STEP 08: Click “Next”.
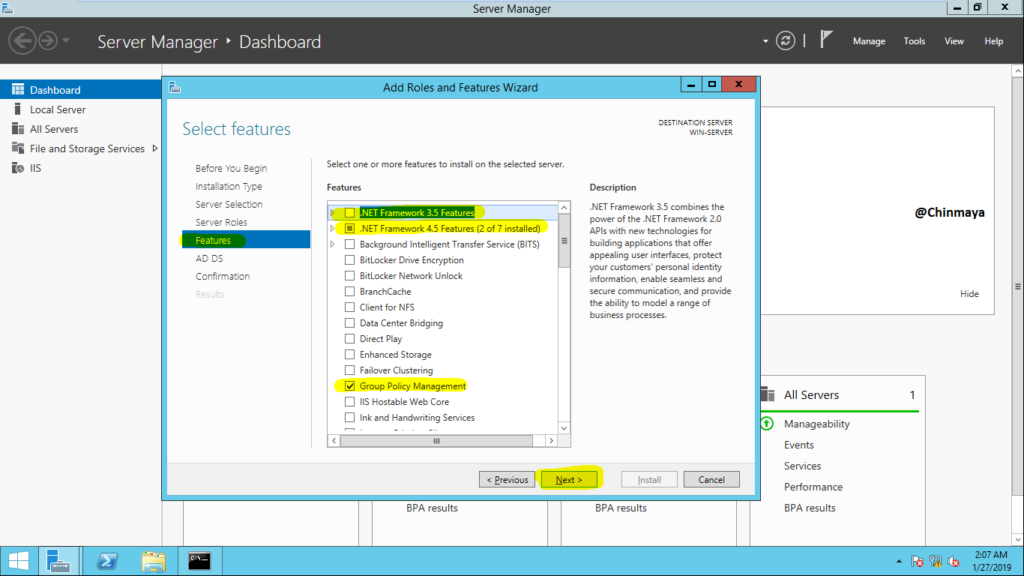
STEP 09: Mark “.NET Framework 4.5 Features” and “Group Policy Management” an click “Next”.
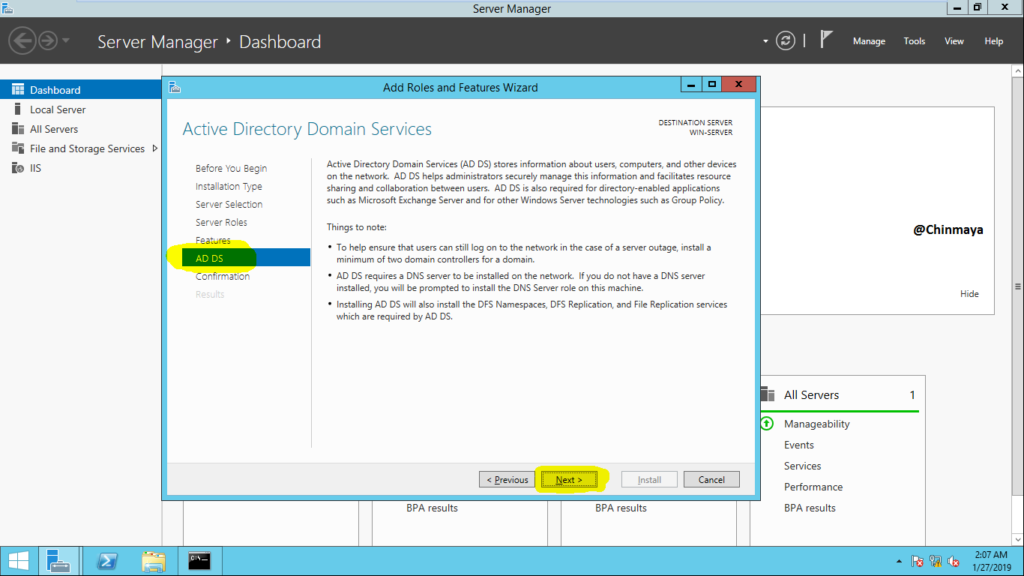
STEP 10: In “AD DS” section click “Next”.
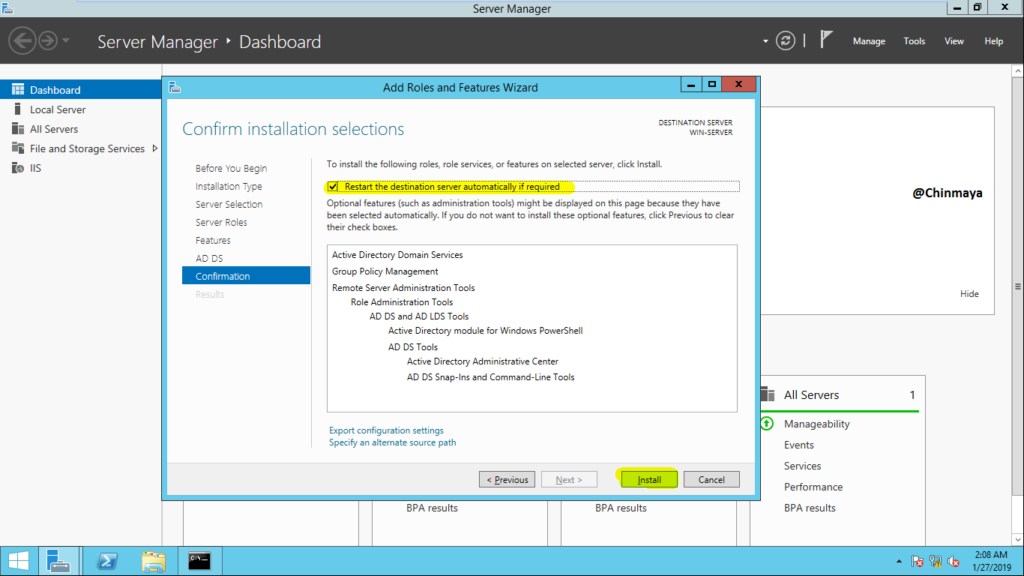
STEP 11: Mark “Restart the destination server automatically if required” and click “Yes”.

STEP 12: Click “Install”.
STEP 13: Click “Close”.
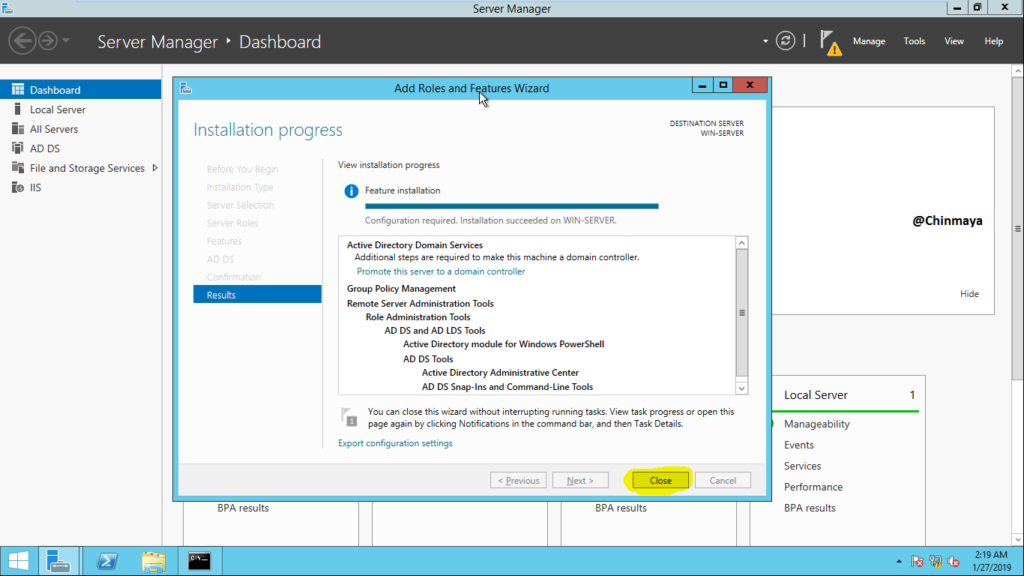
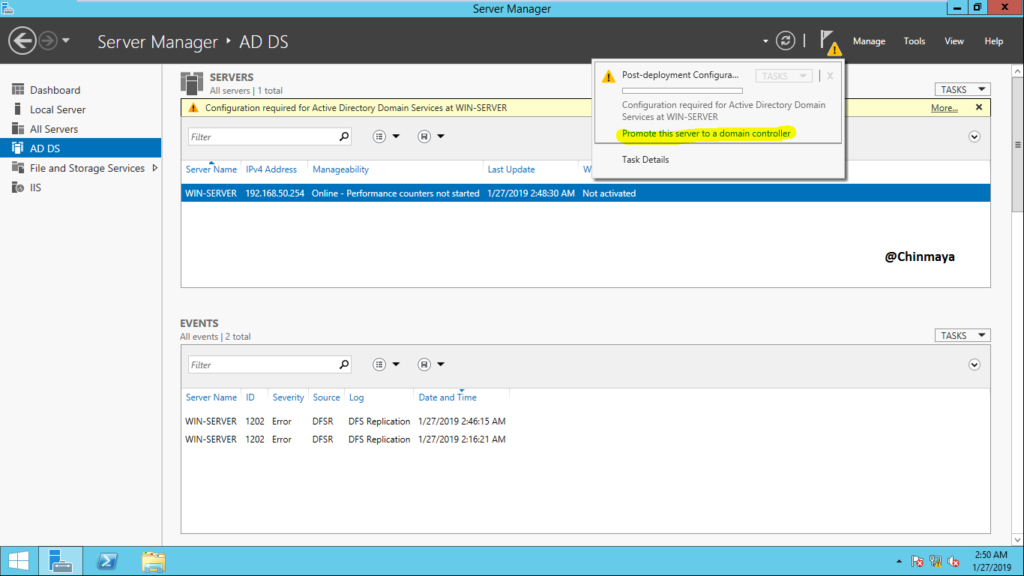
STEP 14: Click on “Promote this server to a domain controller”.
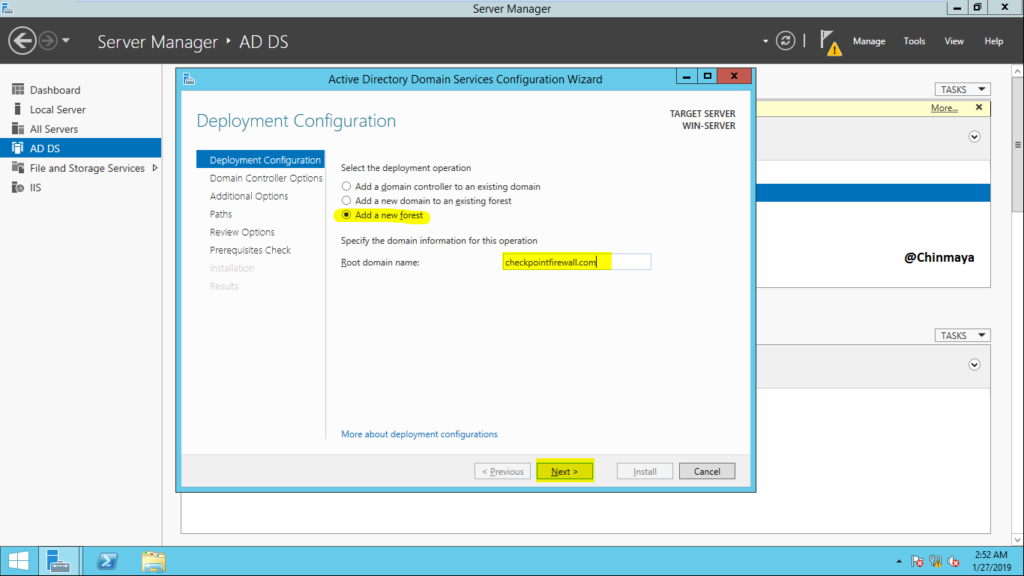
STEP 15: Select “Add a new forest” and assign “Root domain name” I assign as checkpointfirewall.com
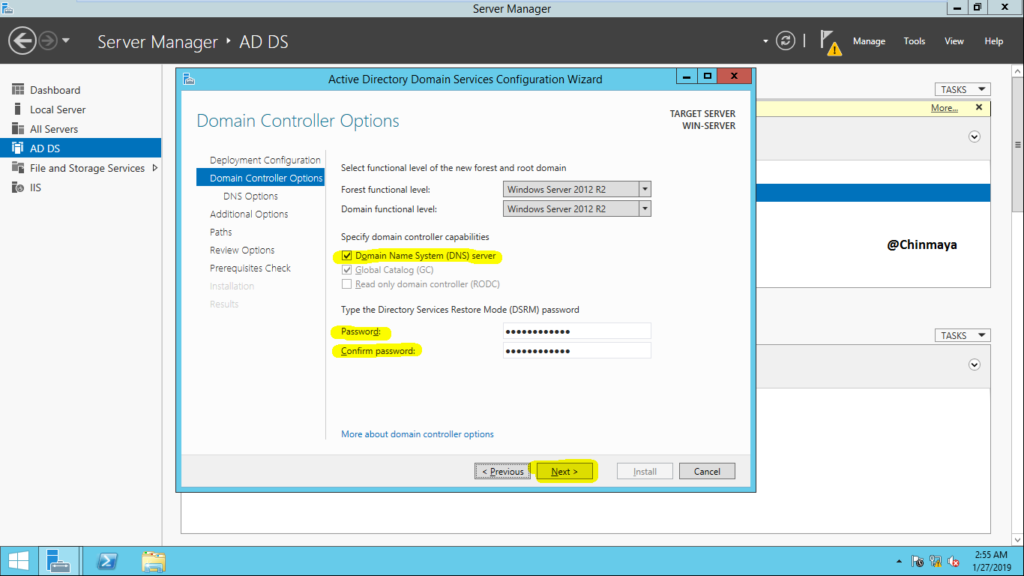
STEP 16: Select “Domain Name System (DNS) server” if not selected then assign the password (Must be Lower case, Upper case, Number) and click “Next”.
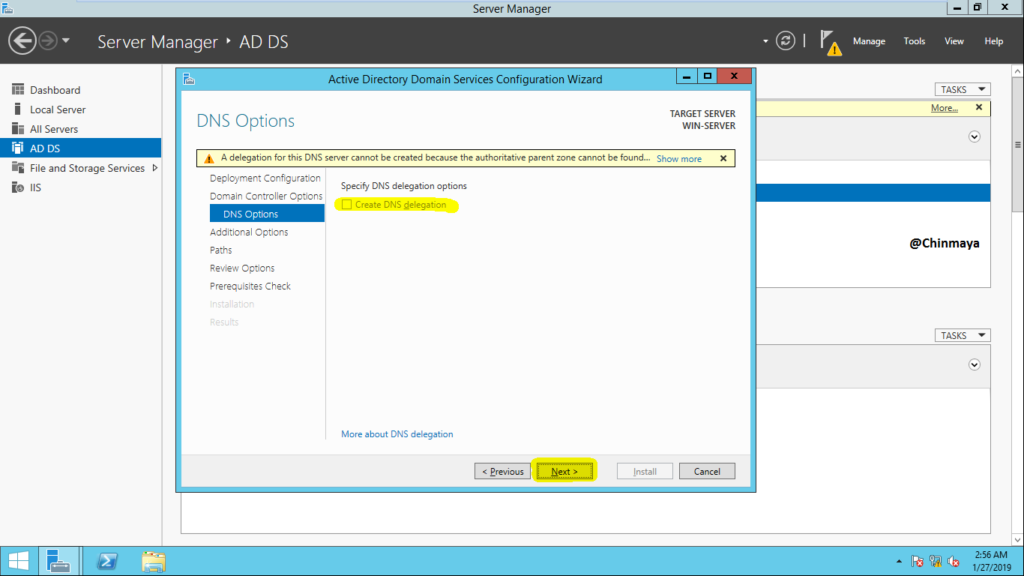
STEP 17: Disable the “Create DNS delegation” and click “Next”.
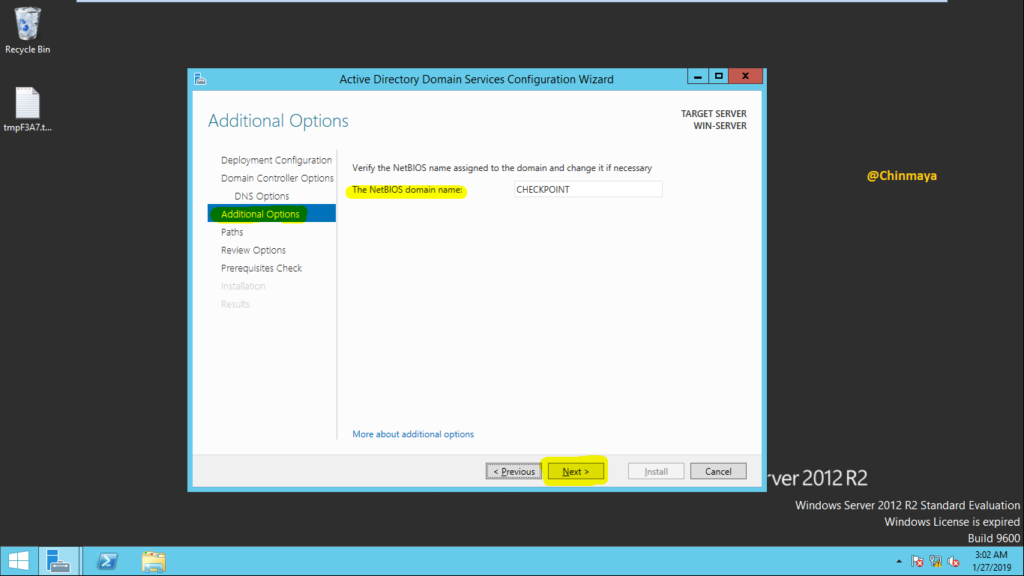
STEP 18: On additional options, “The NetBIOS domain name” give a domain name.
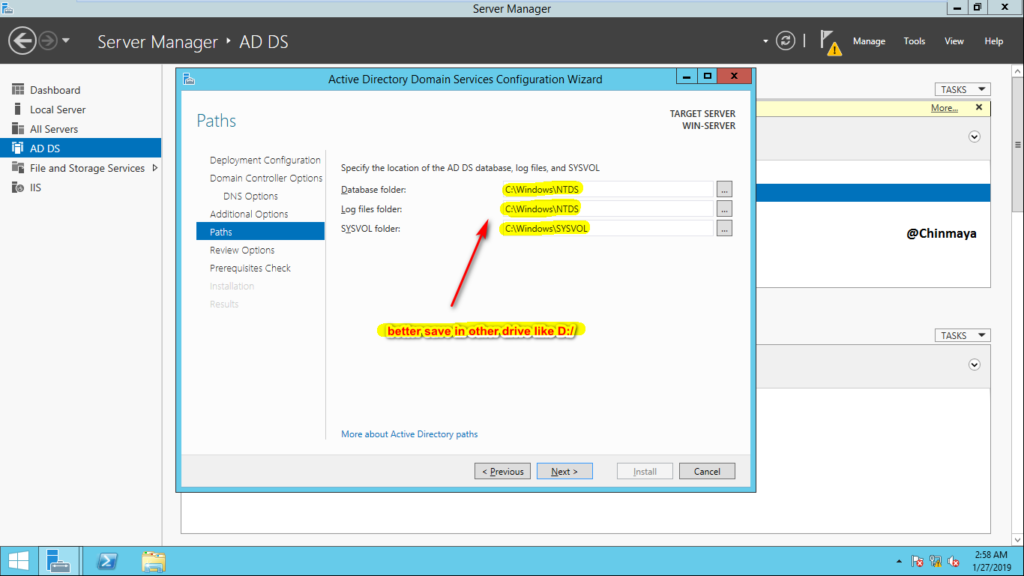
STEP 19: Logs file we can save on Drive. for good, we can save on other than “C” drive.
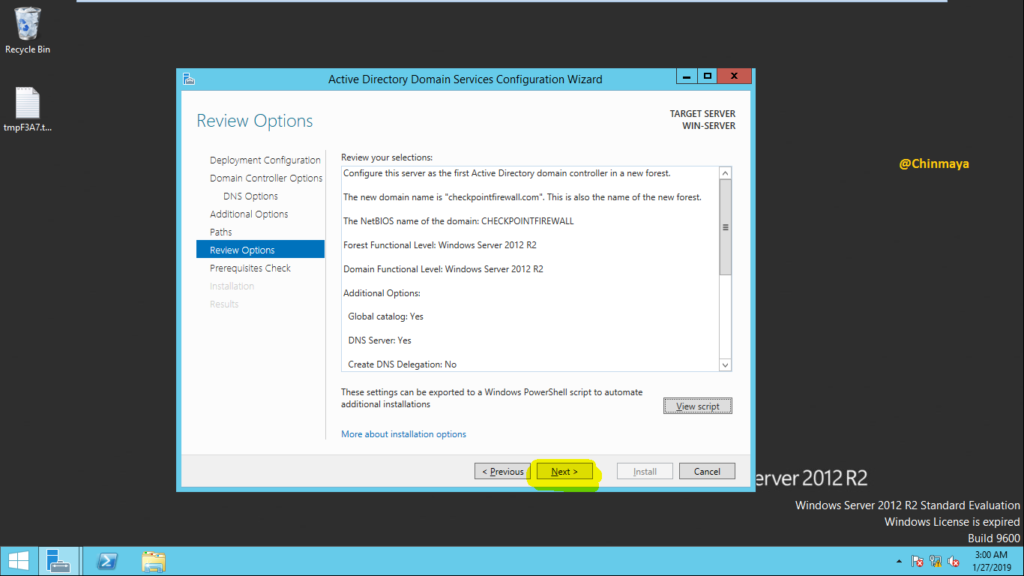
STEP 20: Click “Next”.
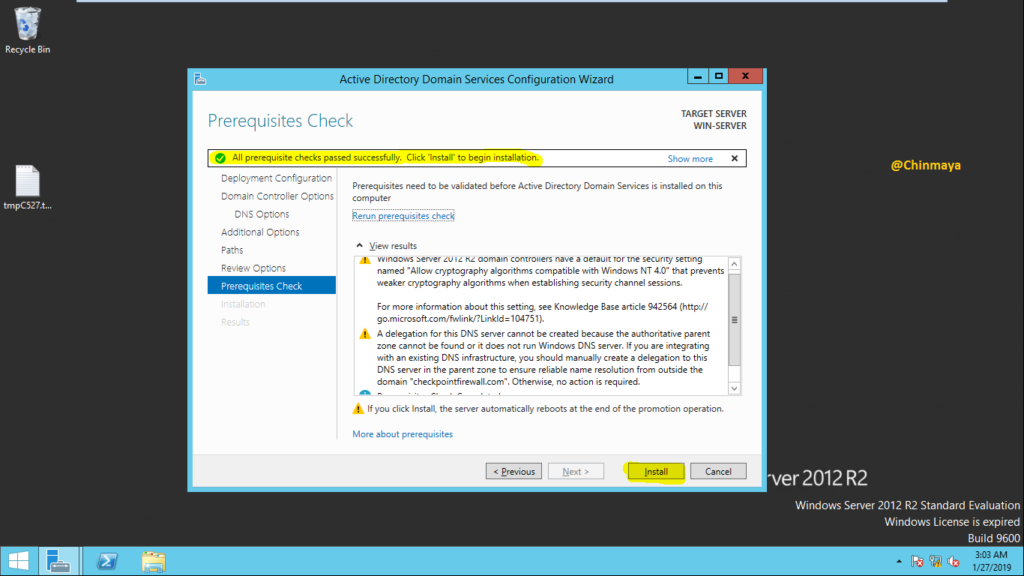
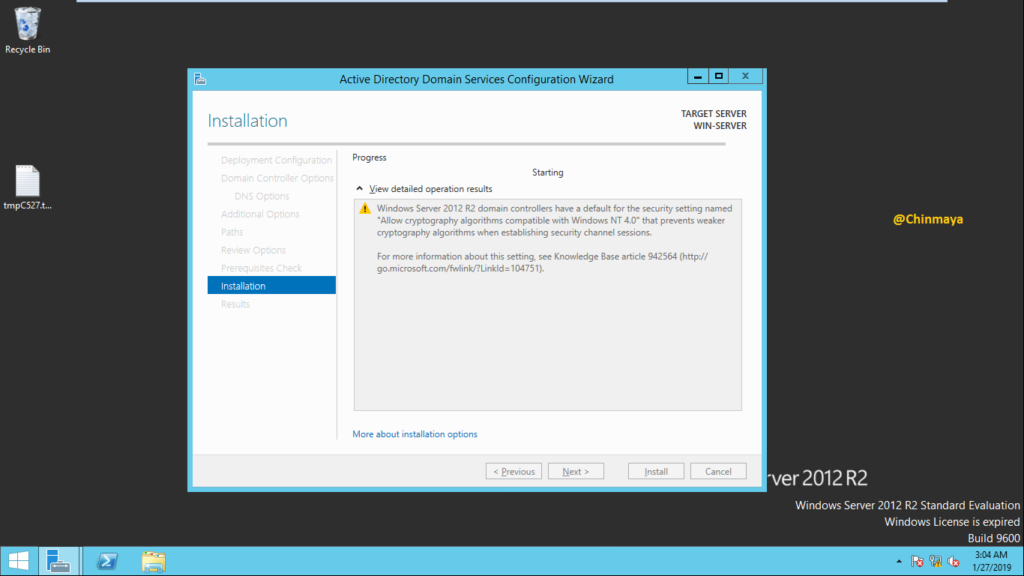
STEP 21: Click “Next” after showing the message like “All prerequisite checks passed successfully. Click ‘Install to begin installation’”.
Installation is starting… after that it will going to reboot.
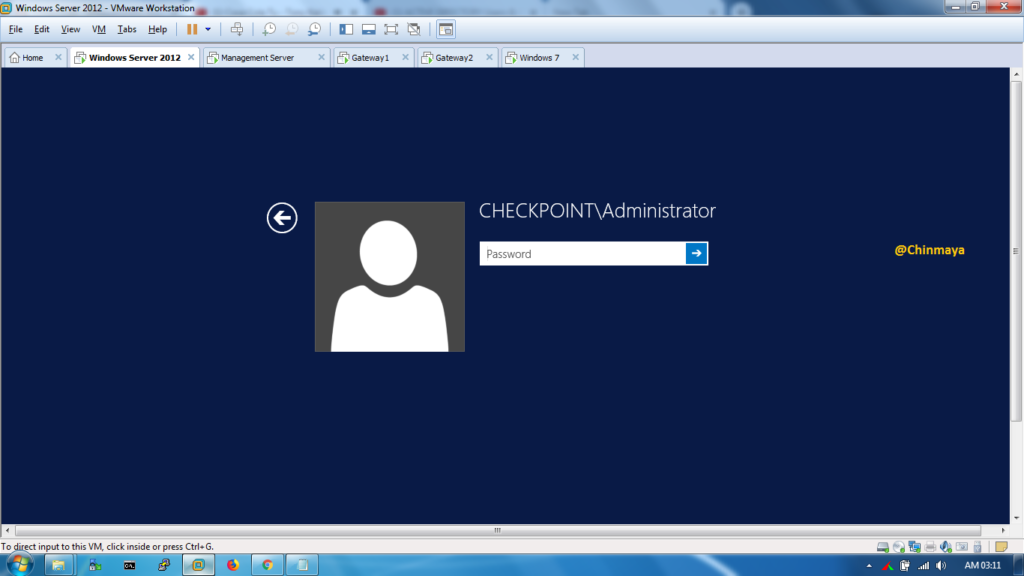
STEP 22: After a reboot now we are going to log in by using the Administrator account.
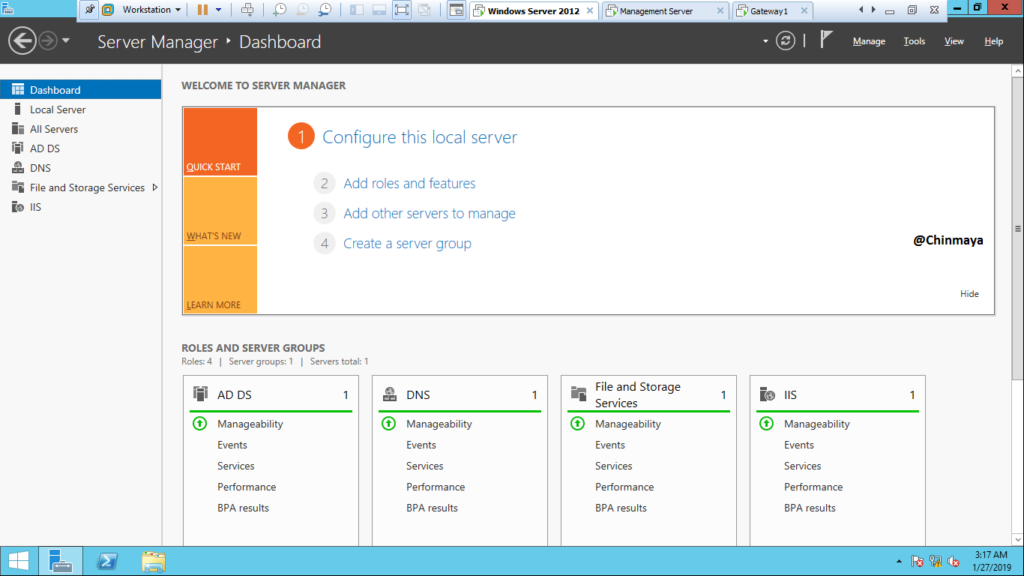
STEP 23: After log in this see the DASHBOARD.


Leave a Reply