Check Point Management Server Backup:
- Migrate Export Backup (Database backup)
- System Backup
- Snapshot Management Backup
- Show configuration Backup
- Log backup
- Export existing Jumbo HotFix
- Log Export Configuration Backup
- Kernel/conf File Backup
Check Point Security Gateway (FW) Backup:
- System Backup
- Snapshot Management Backup
- Show configuration Backup
- Export existing Jumbo HotFix
- Kernel File Backup
1. Migrate Export Backup (Database backup)
[Expert@Host]#cd $FWDIR/bin/upgrade_tools/
[Expert@Host]#./migrate export /var/tmp/Policy_Backup.tgz
[Expert@Host]#cd /var/tmp/
[Expert@Host]#ls -l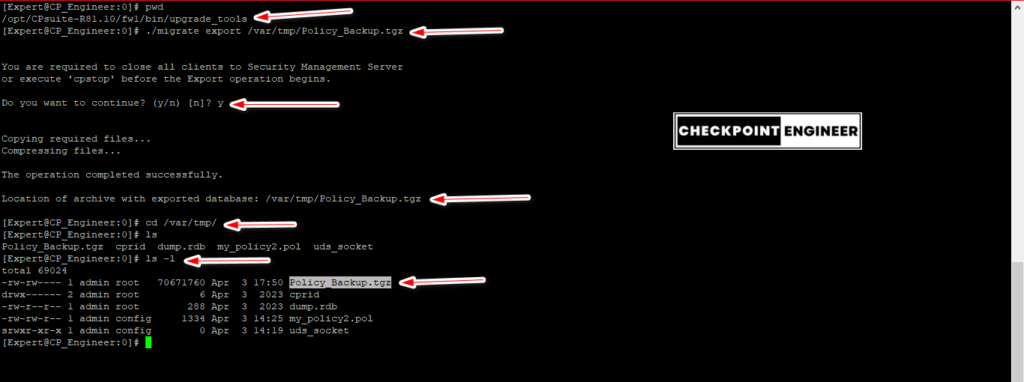
Verify the MD5 value before transfer to your local machine.

How to import the Migrate Export Backup?
[Expert@Host]#cd FWDIR/bin/upgrade_tools/
[Expert@Host]#./migrate import /var/tmp/Policy_Backup.tgz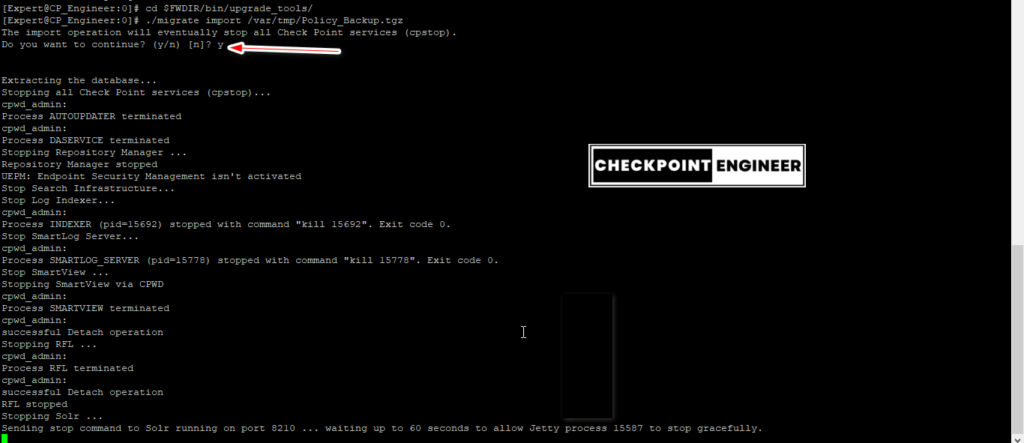
2. System Backup
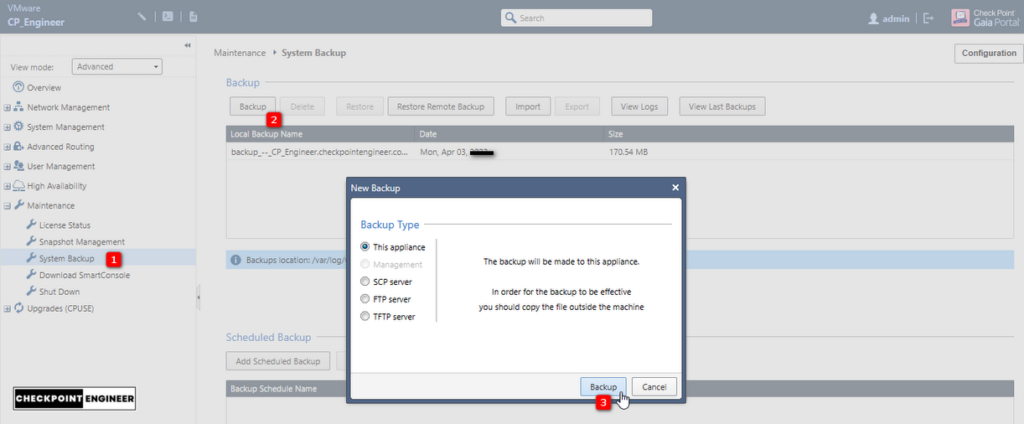
Open GAIA WebUI (GAIA Portal) (Example: https://192.168.100.2)
Goto >> System Backup >> Click Backup
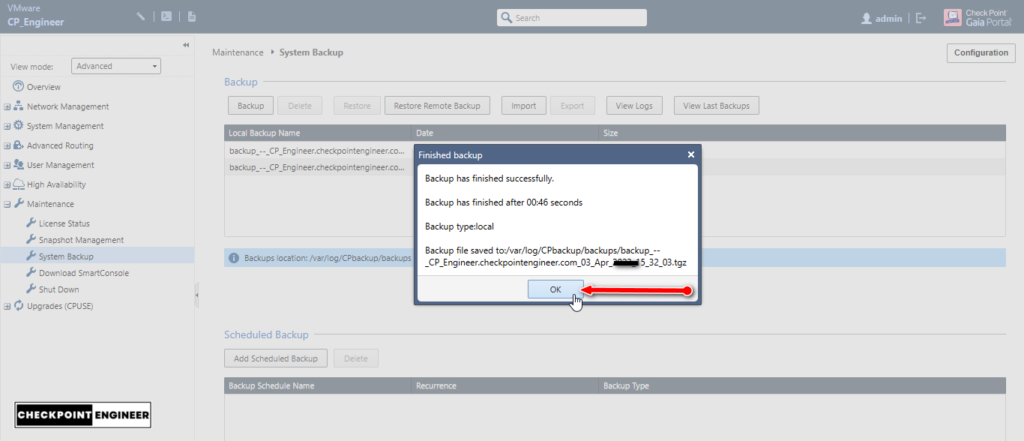
Open GAIA WebUI (GAIA Portal)
Goto >> System Backup >> Click Export Button (System Backup is stored in Download Folder).
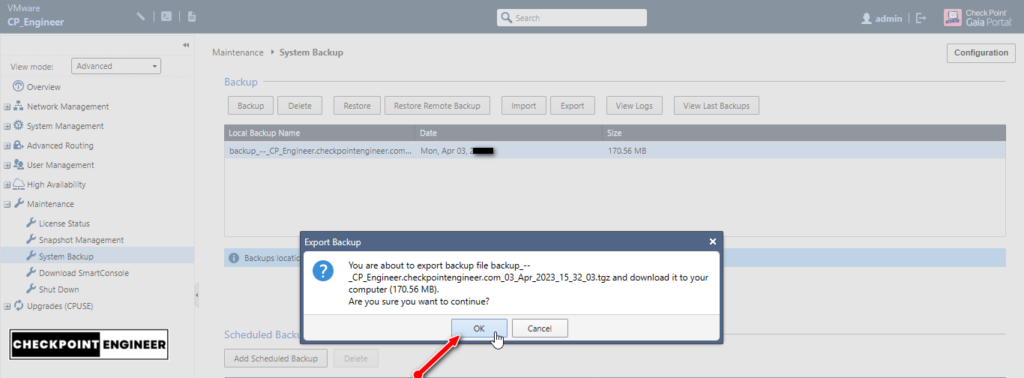
To restore the system backup
Goto >> System Backup >> Select Backup File >> Click Restore

How to take the System Backup using CLI ?
In clish mode:
Run command :
host>backup local
To check the status of the system backup:
host>show backup status
To restore the existing system backup.
host>restore backup local
3. Show configuration backup
Open the putty client and before running any commands enable logging.

Another way to save the show configuration so in this run the below command and then copy or move that generated file using WinSCP.
Command: [Expert@Host]#clish -c “show configuration” > <locatio>/<filename>.txt
[Expert@Host]#clish -c "show configuration" > /var/tmp/Gateway_show_configuration.txt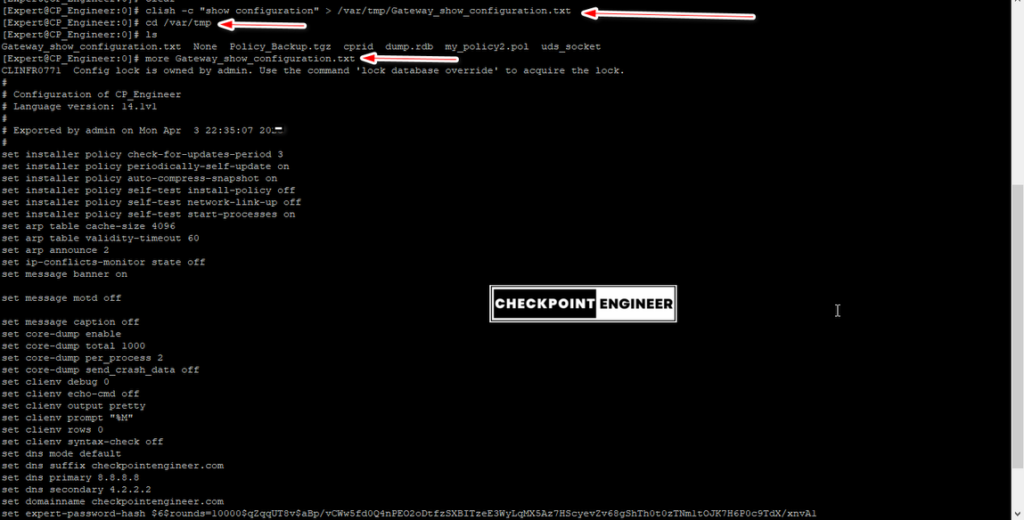
4. Snapshot Backup
Open GAIA WebUI (GAIA Portal)
Goto >> Snapshot Management >> Click New >> Enter Name >> Mention Description
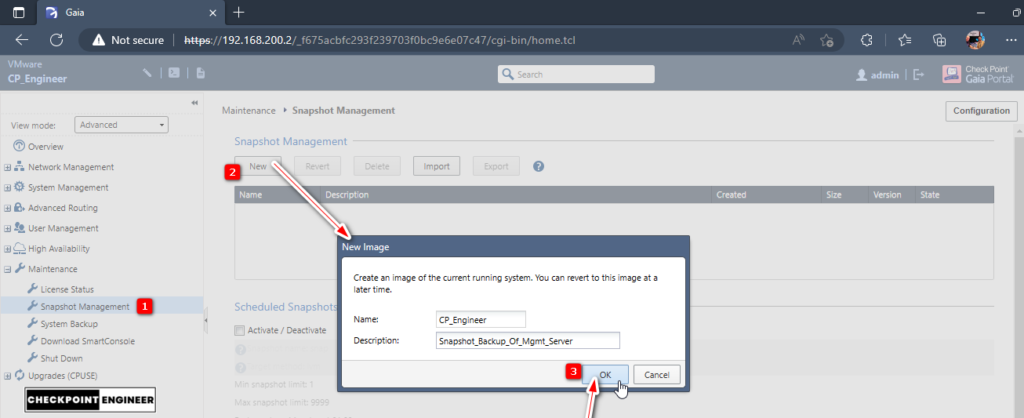
Click on Start Export
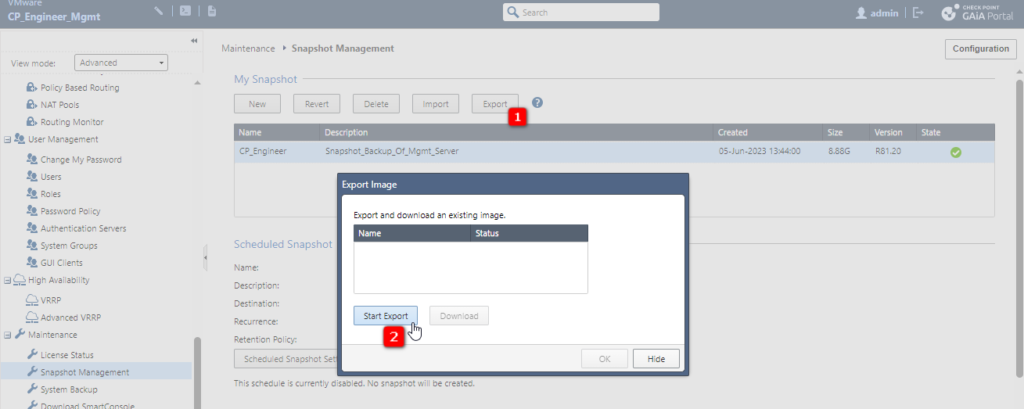
Click Download to download the snapshot backup (Once completed its stored in the /var/log*)
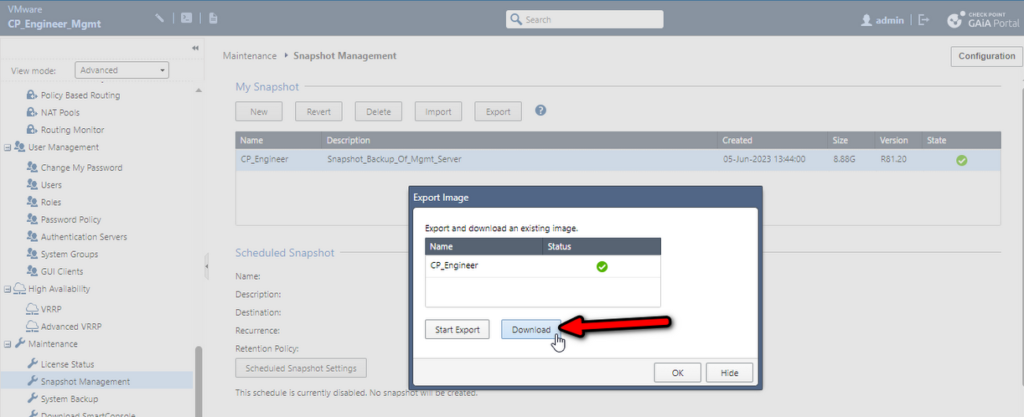
Snapshot Backup store location:
/var/log/CPsnapshot/*You can copy that Snapshot backup to your local machine using SCP tool (WINSCP).
5. Log Backup
The log files for the Check Point Security Management Server / Log Server are located in the $FWDIR/log/ directory.
The log files are named in the format HOSTNAME__YYYY-MM-DD_HHMMSS.log or HOSTNAME1__HOSTNAME2__YYYY-MM-DD_HHMMSS.log
So take that log file backup to your local machine using SCP.
6. Export existing Jumbo HotFix
Open the GAIA WebUI (GAIA Portal) and go to the :
GAIA WebUI —> Upgrades (CPUSE) —> Status and Actions —> Showing All Packages
Select the installed Hotfix package and then click Export to download the HotFix file to take and store in your local machine.
7. Log Exporter Configuration Backup
Noted down the log exporter status to get the configuration data which is needed in case of OS upgradation or any issue in regards to SIEM.
cp_log_export status8. Kernel File Backup
List of conf file backup.
This is required in case of OS Upgradation or any major changes.
$FWDIR/boot/modules/fwkern.conf
$FWDIR/boot/modules/vpnkern.conf
$PPKDIR/boot/modules/simkern.conf
$PPKDIR/boot/modules/sim_aff.conf
$FWDIR/conf/fwaffinity.conf
$FWDIR/conf/local.arp
$FWDIR/conf/discntd.if
$FWDIR/conf/cphaprob.conf
$FWDIR/conf/cpha_bond_ls_config.conf
$FWDIR/conf/fwauthd.conf
$FWDIR/conf/resctrl
$FWDIR/conf/vsaffinity_exception.conf
$FWDIR/database/qos_policy.C
/var/ace/sdconf.rec
/var/ace/sdopts.rec
/etc/snmp/snmpd.conf
/etc/snmp/userDefinedSettings.conf
/etc/snmp/vsx-proxy/snmpd.vsx.proxy.conf
/etc/snmp/snmpmonitor.conf
9. table.def File Backup
The ‘table.def’ files contain definitions of various kernel tables for Security Gateways.
Location of ‘table.def’ Files on the Management Server (R81 in my case).
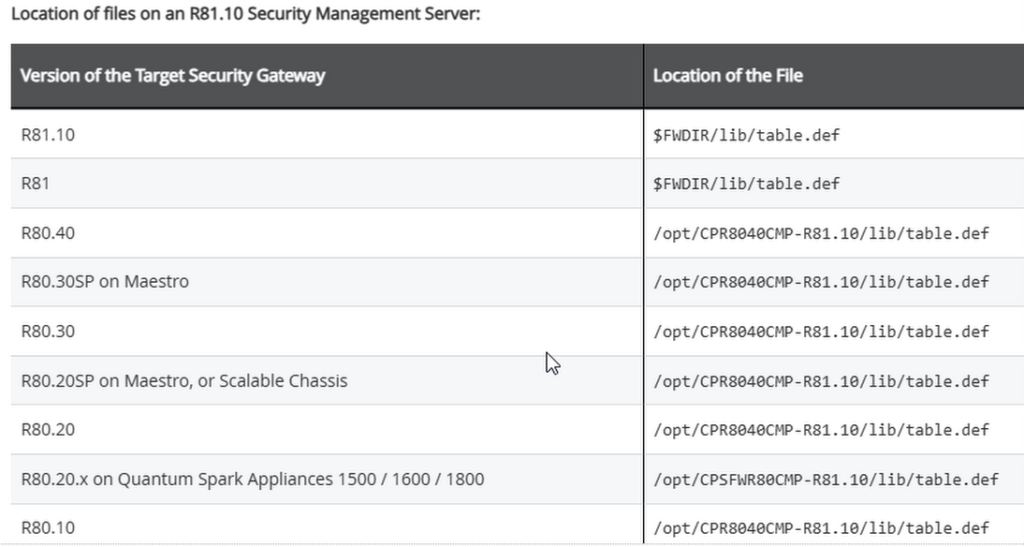
The below part will override in the OS up-gradation so make sure if you change in the below file for any issue like TACACS+authentication then take backup.


Leave a Reply