What is Linode?
Linode offers Linux-powered virtual machines (VMs) to support a wide range of applications in the cloud.For developers, businesses, and individuals looking for a scalable and cost-effective cloud hosting solution, Linode’s VMs are an excellent choice.
Advantages
- Scalable and customizable VMs
- High performance and reliability
- Easy-to-use management interface
Linode is not considered beginner-friendly, but it is developer-friendly.
Users can deploy and manage virtual servers in their data centers worldwide, providing scalable computing resources without the need for physical hardware. Linode offers various features such as networking options, storage choices, backups, load balancers, and Kubernetes support.
visit: https://www.linode.com/
Click Sign up for free $100 Credit. This free trial gives you access to all the features for 60 days.

Deployment can be done two ways:
Method 1 of Deployment:
Click on “Create”.

Click “Marketplace”.

In Marketplace select Kali Linux OS and then set below:
- Username
- Password
Would you like to install Kali Everything Package?
If Select “Yes” then it takes time to install the whole package.
If Select “No” then you need to install your required package after the Kali Linux OS installation.
Would you like to install the Kali Headless Package?
This includes all non-GUI packages that are included in official Kali Linux images. This can be useful if you only need a selected amount of tools and want to have finer control over your system.
This can be useful if you only need a selected amount of tools and want to have finer control over your system.

Would you like to setup VNC to access Kali XFCE Desktop
Select “Yes“
Disable root access over SSH?
Select “No“

Select your near Region.

You can find multiple of option to create:
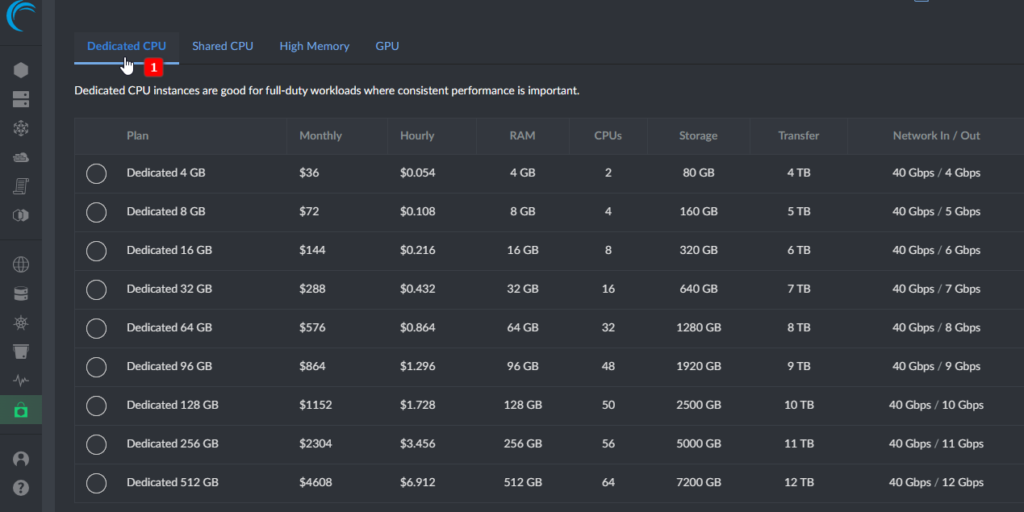
Dedicated CPU
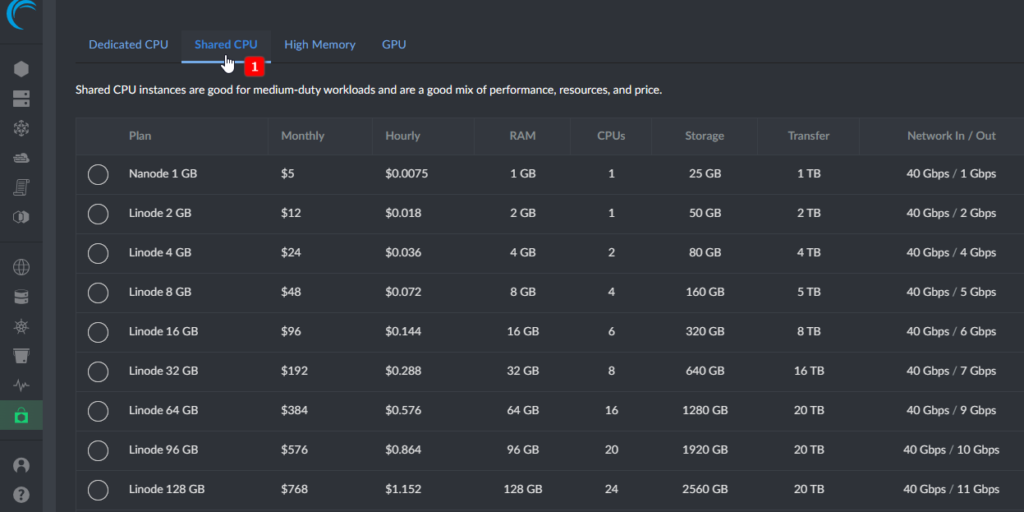
Shared CPU
Shared CPU instances are virtual machines that share CPU resources with other instances on the same physical host. This means that they are more affordable and offer a good price-to-performance ratio.
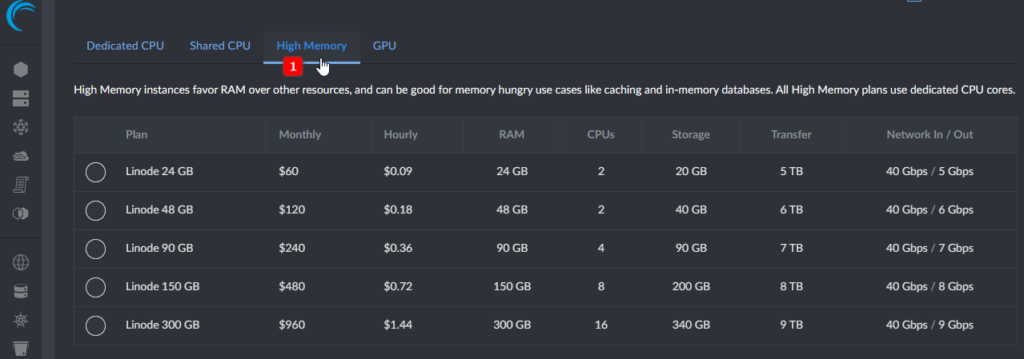
High Memory:
GPU:

Set your Root Password:

Attach VLAN
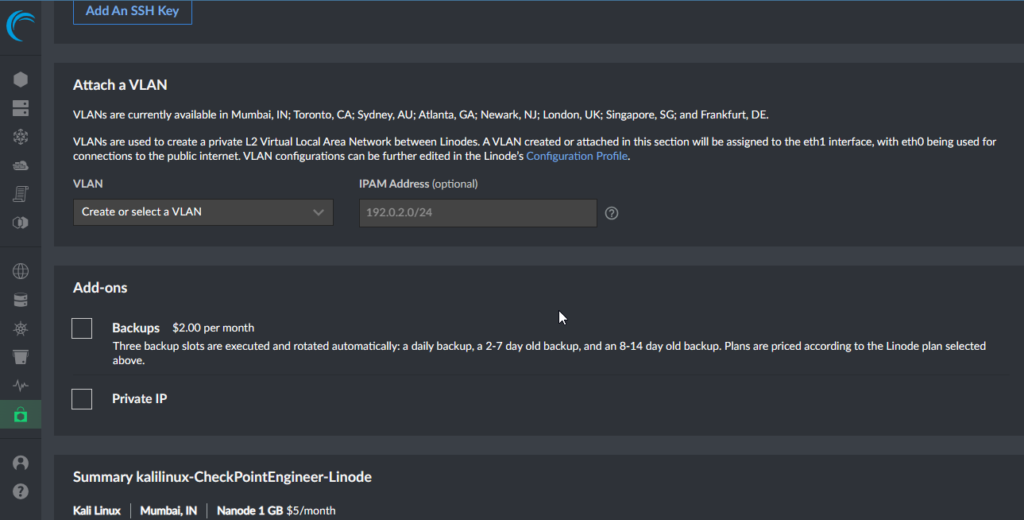
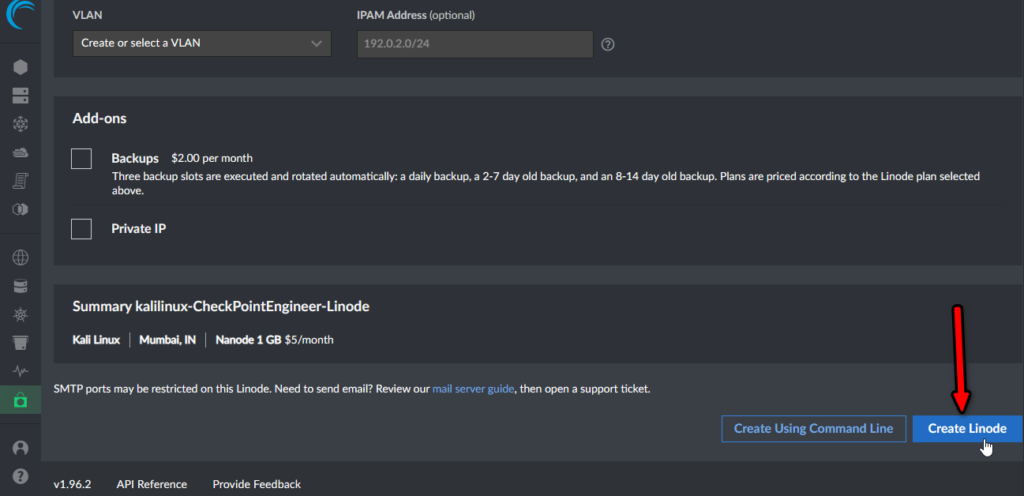
I Select Shared CPU and after that select Create Linode.
Method 2 of Deployment:
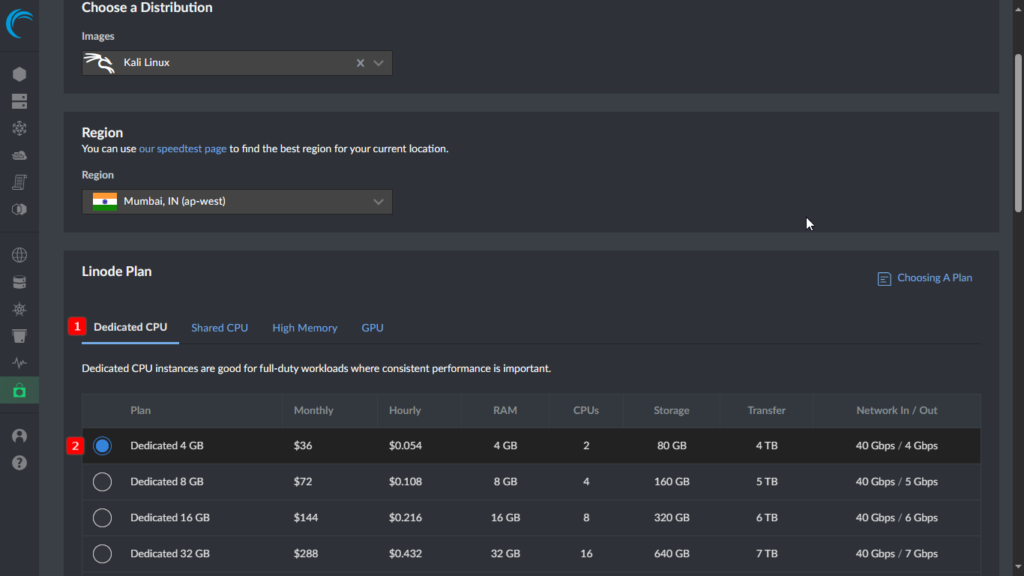
Goto the Distribution and Select Image so I select Kali Linux and also Region.

Here I selected the minimum requirement for Linux for a better run:
Dedicated CPU:which Include:4 GB RAM,2 CPUs, Storage:80GB,Transfer:4TB,Network In/Out:40Gbps/4Gbps)
NOTE: Check the cost for Hourly and Monthly.
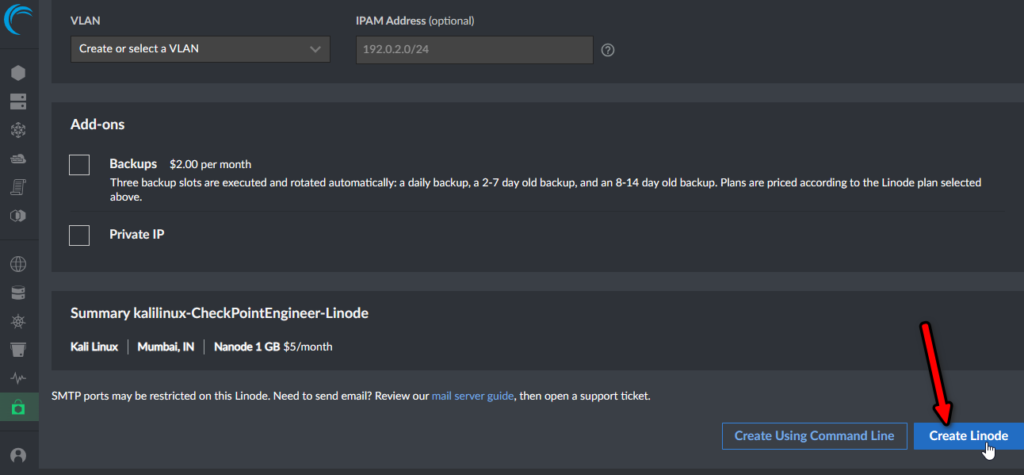
Click on “Create Linode”.
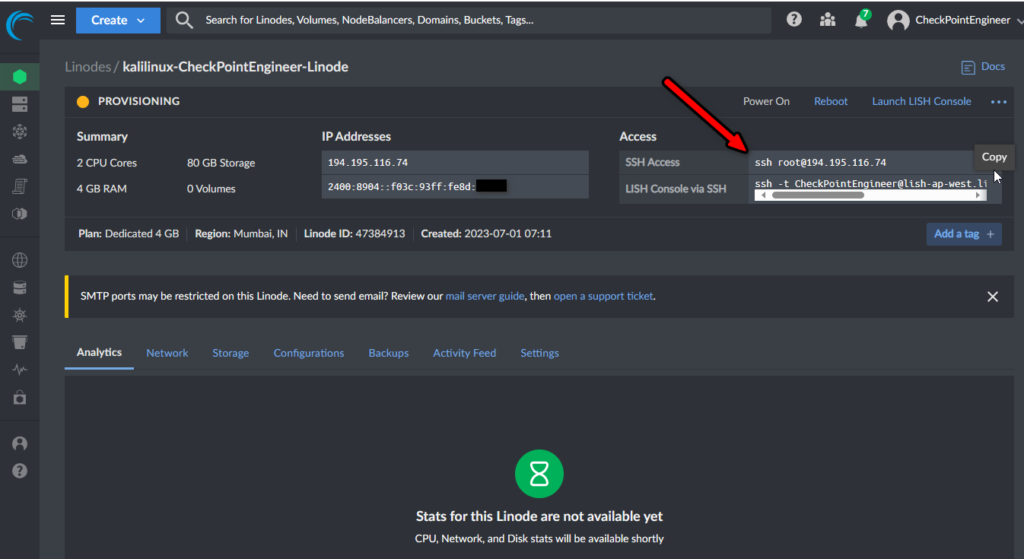
Copy for the root access:
On down multiple options come up so we can select and resize accordingly like storage.
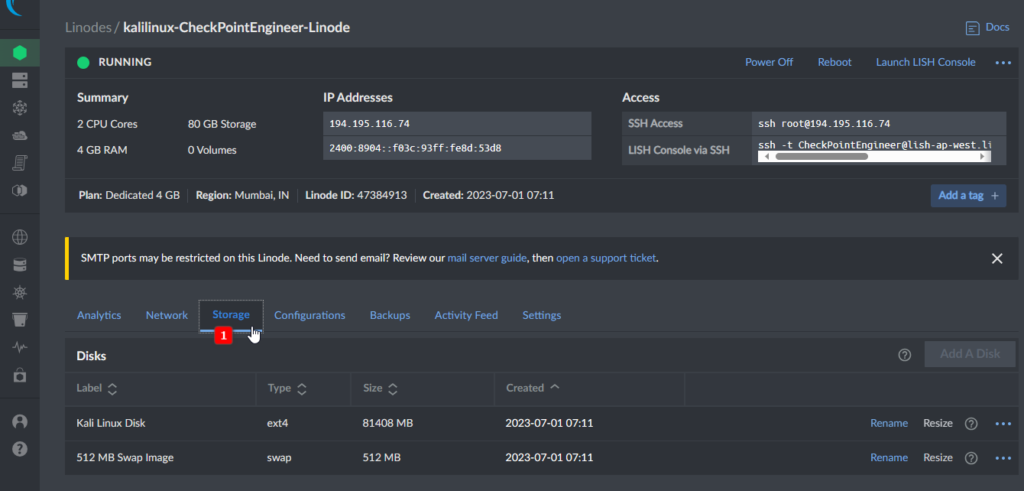
Click Setting

Set Notification Thresholds like CPU, Disk, Traffic, etc.

Launch LISH console for CLI access:
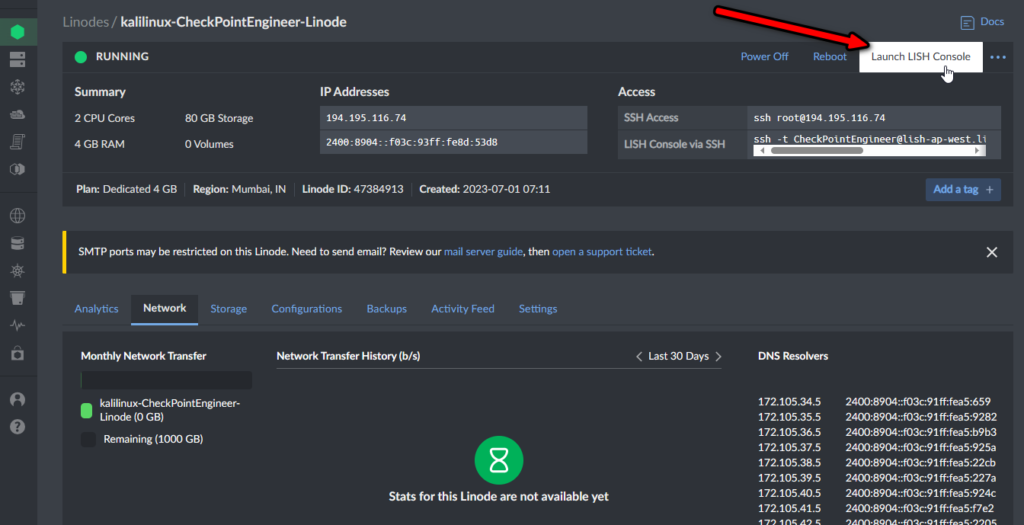
Select Username and Password.
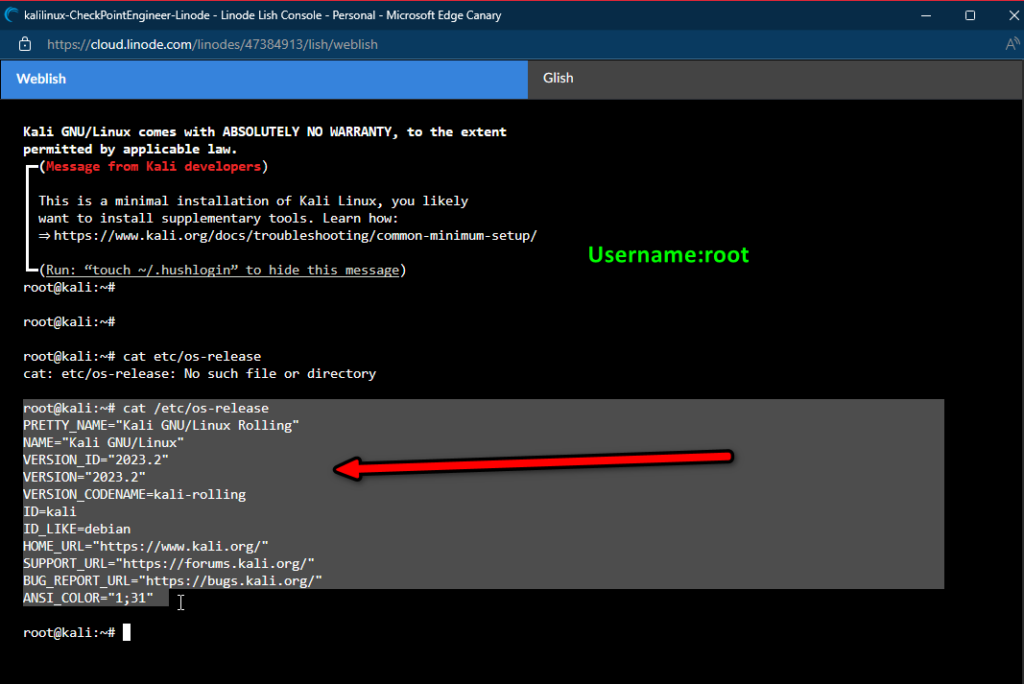
We can also take ssh from our system by using an ssh client app like Putty.
At the start run the below command apt update so can use it to synchronize the package lists on your system. It fetches the latest package lists for PPAs and repositories on your system and ensures that they are up to date.

Now we will access remotely using Laptop/desktop OR Mobile Phone for the graphical user interface.
Run the command to install TightVNC:
TightVNC is a remote desktop software that allows you to access and control a graphical desktop environment on a remote computer over a network.
apt install kali-desktop-xfce tightvncserver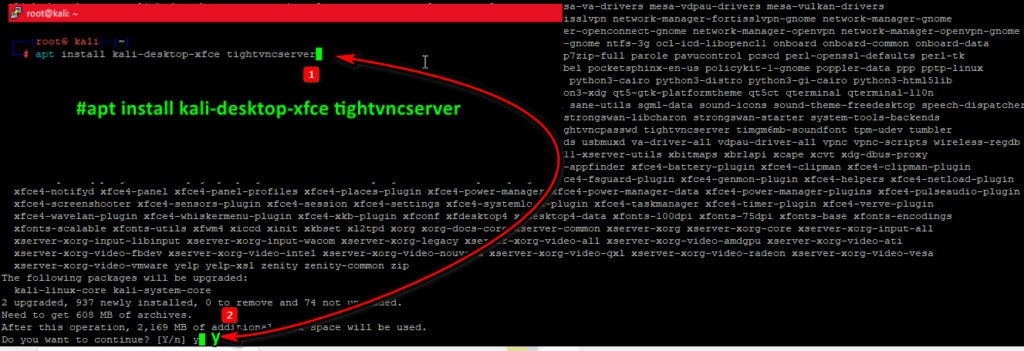
Run vncserver by the below command:
vncserverWould you like to enter a view-only password (y/n)?
Type N
Also, set the password for VNCSERVER which is required to access the GUI from a remote system machine(Laptop/Mobile Phone).

Again I run vncserver command 5 times.
So now you can notice New ‘x’ desktop is kali:5 (Notice the number so in our case is 5)

Now to access the Kali from remote for GUI then first access through CLI and then after connection will access the GUI.
I am using a Windows machine so open the PowerShell and run the command:
ssh root@<IP Address> -L 61000:local:5905 (5905 because ‘x’ desktop is kali:5) (Only last digit we only change)
ssh root@194.195.116.74 -L 61000:local:5905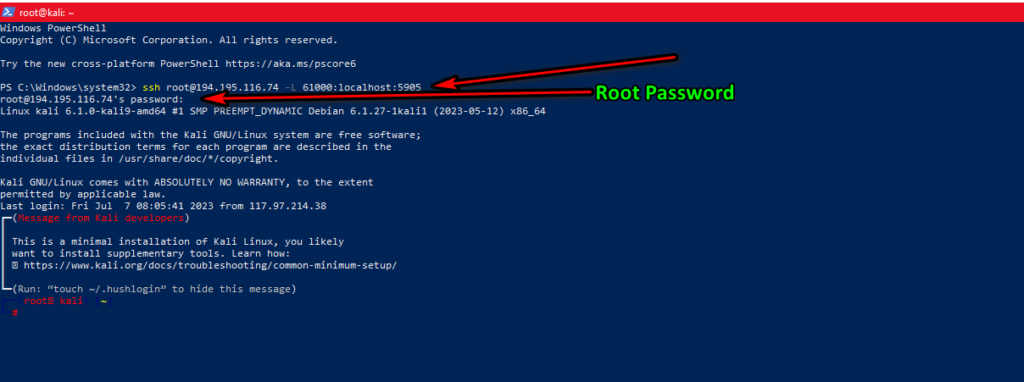
Now we connect via CLI so minimize and download the VNCSERVER client application to access GUI.
I download RealVNC.

Open the application and type localhost:61000
After that Enter the password which you set during the VNCSERVER installation.

Now cool you can access it.
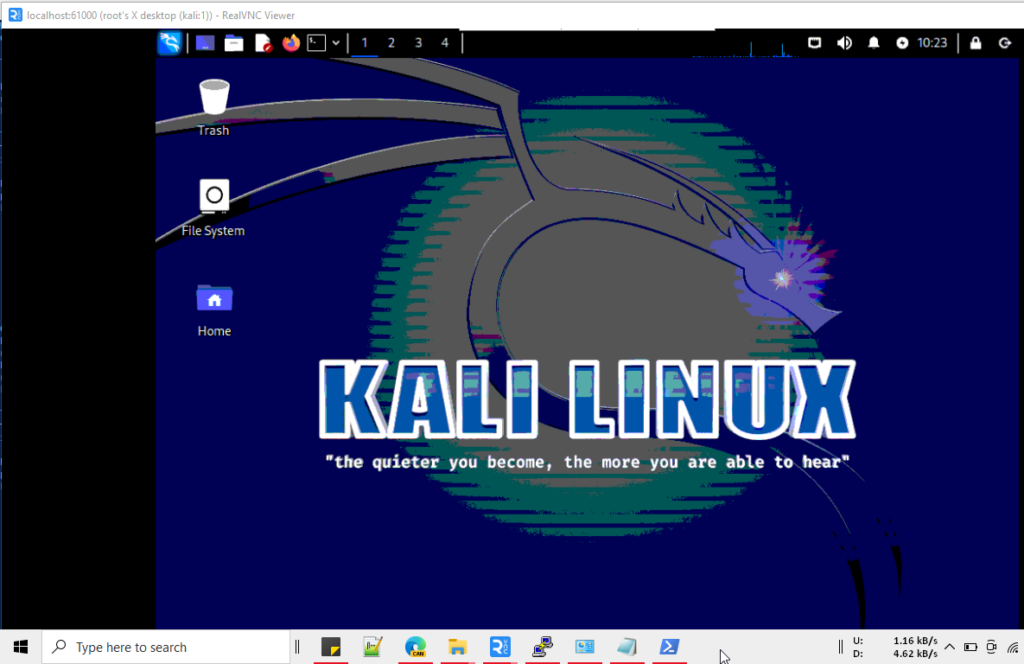
Now we access it through Mobile Phone.
Download VNC Server for your phone and it’s available for both Android and IOS.
Install the application and then put in the public IP address and done.
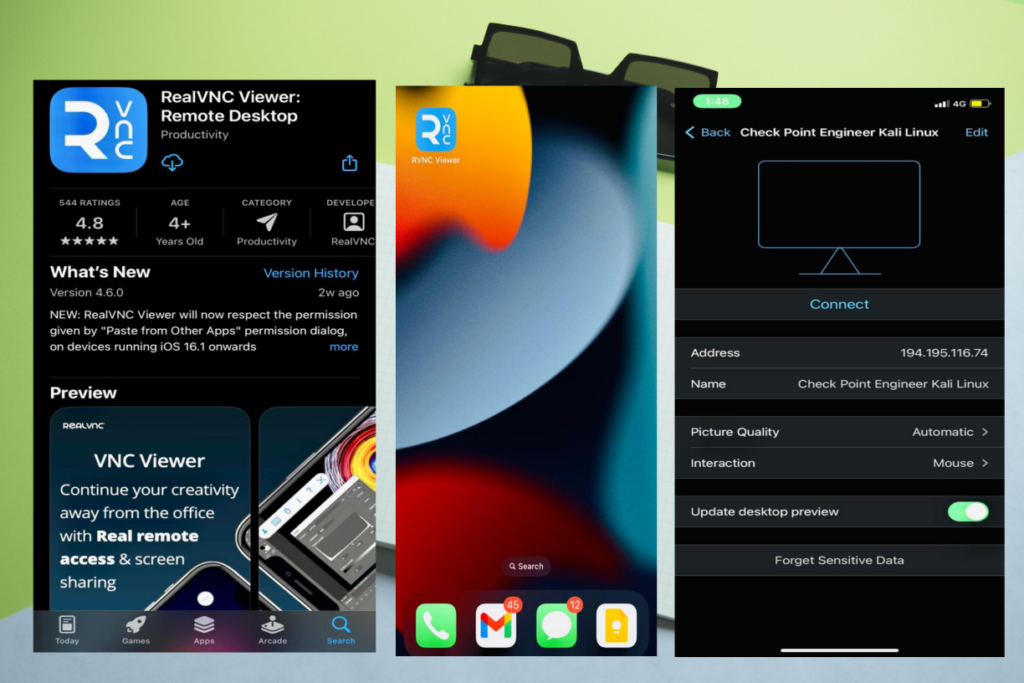
Play Store APK link:
https://play.google.com/store/apps/details?id=com.realvnc.server&pli=1
So Now we able to access remotely with both PC and Mobile phone.


Leave a Reply